Almost getting back!

Has been almost a year since I’ve made something in my sewing machine, but fortunately I think I’m almost getting back!

Since January I’m working from home so I’m still organizing my routine. Working from home is a wonderful thing but you need to get yourself a routine in order to get something done! I’m almost done with mine.

Hope to have something new to share with you in May.

Until then, see this wonderful and easy idea for the cutest toy! Enjoy and make someone happy.


sewing robot toy

New handmade notebook – Bradel Technique

20130630-012115.jpg

I’m working in a new kind of handmade notebooks!
I’m using the bradel technique that, in my opinion, is a wonderful way of bookbinding.
Unlike the traditional binding, bradel give you a great finishing of the cover, since the cover is made with 3 separate pieces.
Bradel is perfect for decorative notebooks, since you can use at least 3 different materials without the effort of trying to do a perfect collage.

In this notebook I used 3 types of fabric, a black one and 2 with stripes. Before placing the fabric into the board, I’ve used my sewing machine to make my own strips! This way you can make a unique handmade notebook, because the fabric is also a unique pattern. And you can’t tell that is has been sewed.

Hope you liked!

20130630-012224.jpg

Kobo Covers – Handmade

I’ve got a Kobo Glo for my birthday! I love to read, but I’ve never tried an e-reader.Don’t know why, maybe it was because I really love the physical books, maybe because I thought that reading from an electronic device would get me tired really fast… but… I was so wrong! 

This e-reader was one the best things that I’ve bought (yes, in my whole life). Thanks to this e-reader I’ve begun to read much more! In 2 weeks I read 3 books!

So, about the covers, I needed a cover for my Kobo Glo, but I didn’t want to pay 40€ for an “official” cover, so I made my own! Actually, I made two! 

Handmade Kobo Covers

This cover is similar to a hardcover book.

Reading Kafka – The Process – Such a great book!

This Kobo Cover is similar to a hardcover book too. This fabric is very soft and comfortable to hold.

You can close it very easily with the velcro. 

It’s perfect to carry in your purse.

The Kobo Glo, and the e-readers are now part of my world! I’ll continue to develop new and better covers for e-readers (yeah, I like to change it often).

Sewing projects – Getting organized

I’ve been very busy lately, but fortunately I’ve also been busy with projects for myself! I’m working very hard on a new project (news soon) and that makes the exhaustion seem just a tiny detail.

Update on the sewing projects!

I’ve done so far:

  • A pouch for my phone
  • A case for my glasses (matching with the phone’s case!)
  • An infinity scarf with this fabric

Soon I’ll post pictures and more details about these projects (right now I’m just too tired).

The beautiful cat fabric

The beautiful cat fabric

This weekend I want to do:

  • Ruffled Scarf (with the same cat fabric)
  • Bed Organizer (to store books, phone, and other stuff)
  • Fabric Bracelet (yes, with the same cat fabric! I love that fabric and I have tons of it!)
My model will be a bit different. I'm thinking to add at least two more compartments. http://www.quiltmag.com/sewing-projects/quilt104-crazy-about-pinwheels-bed-organizer/

My model will be a bit different. I’m thinking to add at least two more compartments.

Mine will have a light cat instead http://www.mrspollyrogers.com/2012/12/felted-sweater-bangles/

Mine will have a light fabric instead

I see a lot of projects that I really want to do, but I tend to forget them, but now I’ve find a way to keep my sewing projects organized.

I use Pinterest to get organized with my To Do projects. I’ve a board for  things that I want to do and another board for the things that I’ve already done.

How do you keep track of the things that you want to accomplish?

Polka Dot Fabric – With acrylic layer!

Today I wanted to show you my new purchase! I have two cats and they like to play with the food and water, so my kitchen’s floor is always adorn with food!

I wanted to make a placemat for them but I didn’t want to use that plastic fabric, that vinyl, because it shines too much! I couldn’t use normal fabric too, because you can’t clean that everyday.

The other day I was doing some shopping at IKEA and I saw this polka dot fabric! It was perfect! It has an acrylic layer so it is cleanable with a wet towel!

It’s perfect! It doesn’t shine too much and I can clean their mess everyday! I can also machine wash if it gets really dirty. It was available in black and white and in red and white. I choose the black and white because it suits my kitchen better.

I’m going to use this tutorial to make a new placemat! I hope the kitties will like it!

I know, I know, the fabric is all wrinkly, but it’s very difficult to press!

polka dot fabric

Polka dot fabric

See the water? It stays on top!

Tutorial – Simple Placemats

Tutorial simple placemats Top stitch

Remember when I said that I wanted to try things by myself? Well, I have made my first project without checking tutorials!

Yes, it’s a very simple one, so it was almost impossible to make mistakes, but I needed something to offer to my mother on her birthday and placemats seemed a great gift!

I’m gonna make a tutorial for this simple placemats so you can make your own!

You’ll need:

  • Top fabric (I used some decoration fabric from Ikea)
  • Back fabric (I used some medium weight cotton)
  • Interfacing (I used some medium interfacing, for sew)
  • Matching thread
  • Sewing machine
  • Iron

Tutorial simple placemats_Material

First cut your fabric with the desired measures – Remember the seam allowance – This tutorial is for 2 placemats.

Remember to pre-wash your fabric! You want the placemats to be fully washable, they will get dirty!

Press them very well.

Tutorial simple placemats_interface

Cut the interfacing, I used this one (sorry, don’t know the name/number). As you can see this interfacing is kind of fluffy.

You can cut it just a bit smaller than your fabric, to reduce the bulk.

Tutorial simple placemats_pin

Pin everything in place. My hearted pins are so sweet!

I didn’t care too much about the size, as you can see, because you can cut it later, just remember to catch both fabrics when sewing.

Tutorial simple placemats_sew

Next step in this tutorial for simple placemats…sew!

Place the right sides together and remember to leave a gap. You will need to turn the fabric inside out. I used a 1/4 seam allowance.

Tutorial simple placemats_trim the corners

Trim the corners to reduce the bulk and turn! Your placemats are almost ready!

Tutorial simple placemats

Use something to get those corners perfect! I used a bone folder because I also make traditional notebooks, but you can use a pen or something similar.

Then..Press, press, press! We will thank me for this! It will be much easier to top stitch this way.

Tutorial simple placemats_time to sew

Now, it’s time to top stitch! Use some matching thread and be very careful with the corners. Let the needle down and turn the fabric.

My stitches were a little tight because I was having some problems with the machine  (I discovered later that my needle was dull and I needed a new one).

Tutorial_Simple Placemats

Tadammmm!!!

The final result! I’ve to confess that I was really happy with the final result! They turned out prettier that I thought and I really like the texture. They were consistent but fluffy at the same time! I’ll be using that interfacing for placemats again!

And… my mother loved them!

If you are a beginner in the sew world, I hope you enjoy this tutorial for simple placemats. They are really fun and easy to do and I loved the final result!

I may be linking if these great parties!

My new Craft Paper Punches!


Craft paper punches

So, this Saturday I went to a store to buy some food for my lunch, but when I was passing through the corridors I saw something that caught my eye…something colorful…with hearts!

A beautiful set of craft paper punches were there smiling at me! Of course, I had to bring them home.

I was trying to buy some punchers for a long time, but they are hard to find here, so when I saw it, I was so happy!

With these gorgeous craft paper punches you can:

  • Print hearts (or bears!) in jeans or other clothes (I want to make these jeans)
  • Make beautiful cards!
  • Decorate your notebooks (oh I’ll make some hearts on mine!)
  • Embellish house stuff, like place mats and jars!

Craft paper punches

The possibilities are endless; you just need to be creative! For a person that can’t draw, even simple shapes, like me this is just perfect!

The craft paper punches are really sturdy and I’m really happy with this purchase!

Craft paper punches

Learning to sew – Idea nº 1

No tutorials for me – The first great idea!

Tutorials are a great way to learn how to sew; you can see how things are made and you can reproduce that.

This is great, unless you are a lazy person like me. When I see tutorials I tend not to think, I only read and reproduce, not thinking about the process. This can lead to a numerous mistakes. I’ve spend hours undoing things because I didn’t read the tutorial properly and I didn’t think. I’ve made a wallet, a beautiful one by the way, but the cards holders…were in the wrong side. Yes, for real! They were inside the wallet and were not visible after sewing.

This way I’m not learning properly, so I decided that for 2 months I’ll only make experiences by my own!

I’ll think of stuff that I would like to make and I’ll do it! I know that it will lead to a lot of mistakes but I think that I will learn more this way.

I’ve already two projects in mind: Some place mats with various top stitches and a ruffle scarf with my beautiful cat’s fabric.

What do you think? How did you learn?


Tutorial – Lace Shorts – DIY

Meet my new love!

My new lace shorts!

Tutorial - Lace Shorts DIY

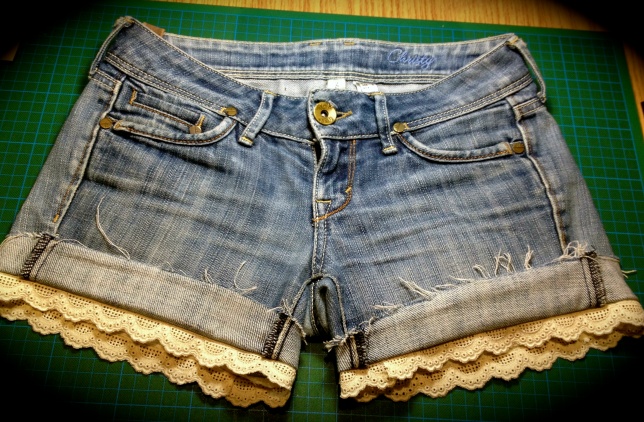
While wandering through Pinterest I saw somebody using a lace shorts and I immediately fell with love with them. It was only somebody using, it was not a DIY or a tutorial, but I HAD to try it it!

With my new organization method, I finally had some time to sew! I used an old jeans, they had a huge hole in the knees (I spent a lot of time sitting) but were still good for a shorts!

This project is really easy and quick to do, so I thought why not sharing it? In 6 easy steps you have transformed an old jeans into this sweetie!

Let’s do this?

You will need:

  • Old shorts (with a great fitting)
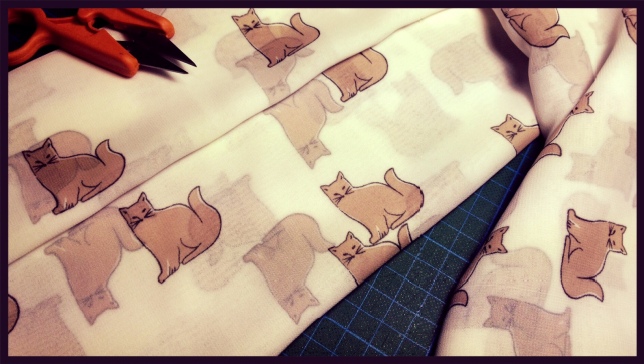
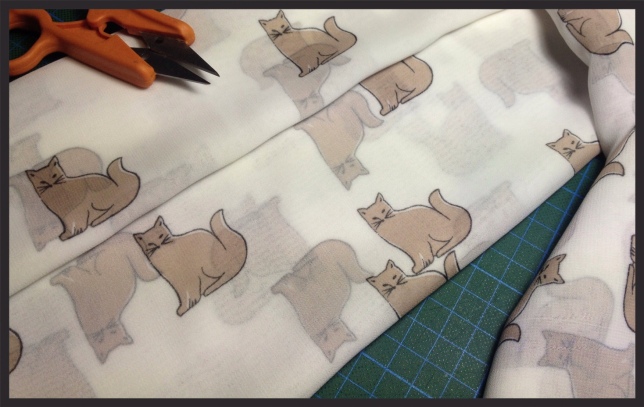
  • Lace
  • Scissors
  • Pins
  • Sewing Machine

Lace shorts tutorial – DIY

1. Mark the length 

First you have to mark the length. Try them on, find out the desired length and mark them two inches longer. You can use a chalk or a pen.
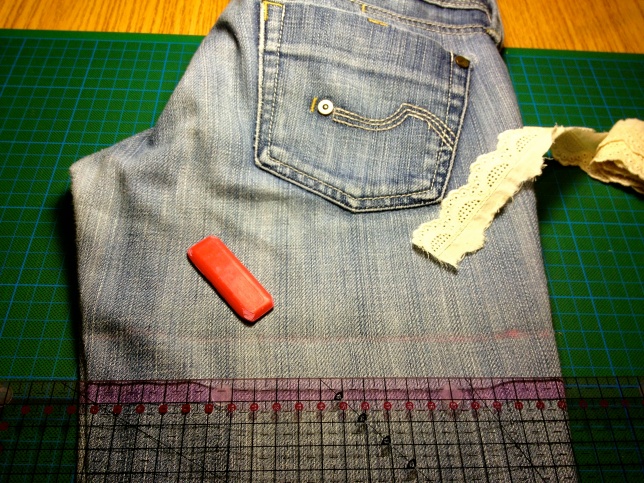
Marking the length

2. Cut both legs

Use pins to keep everything in place and cut! Don’t be afraid, you’ve left two inches longer so you can make adjustments!

One leg marked

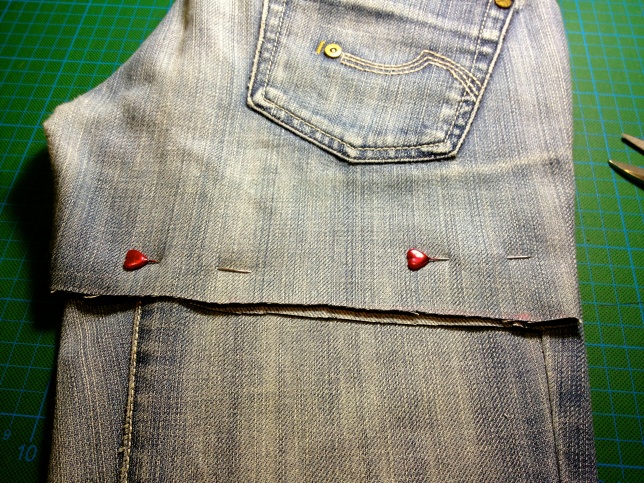
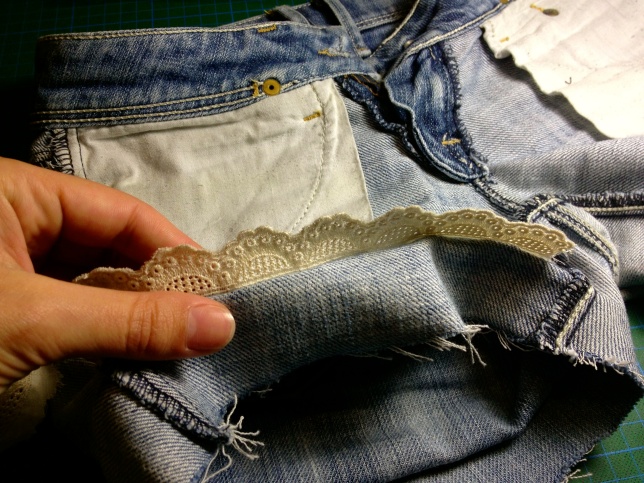
3. Let’s adjust the fitting!

The best way to be happy with your new lace shorts is to be very careful. So, try them on, and fold right as you will like them to be. They can be shorter on the back, or in the front…you choose! Cut more if needed. Mark them with pin and undress. Be very careful with those pins!

Fold and Mark

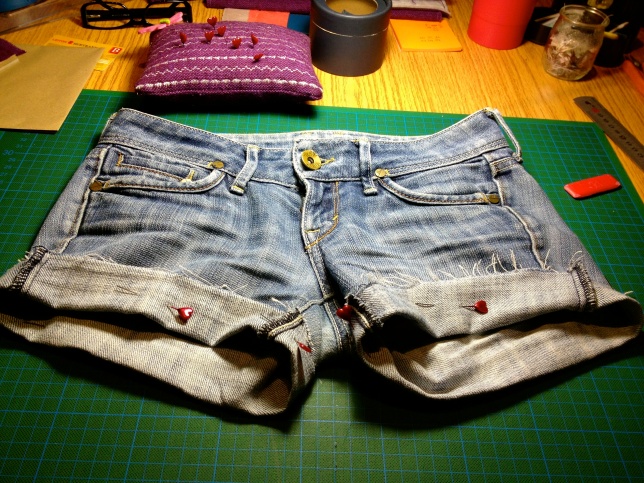
4. Press, press, press

Now it’s time to press! Press very well because you will need to see that line that marks the fold. You have to press your lace shorts folded, so that when you unfold, you can the line.

press

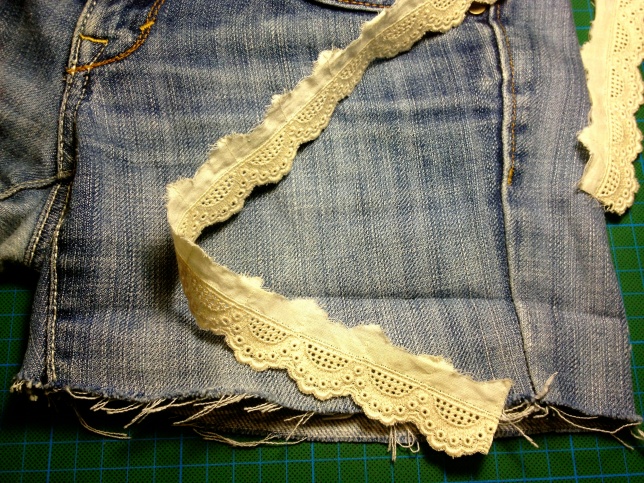
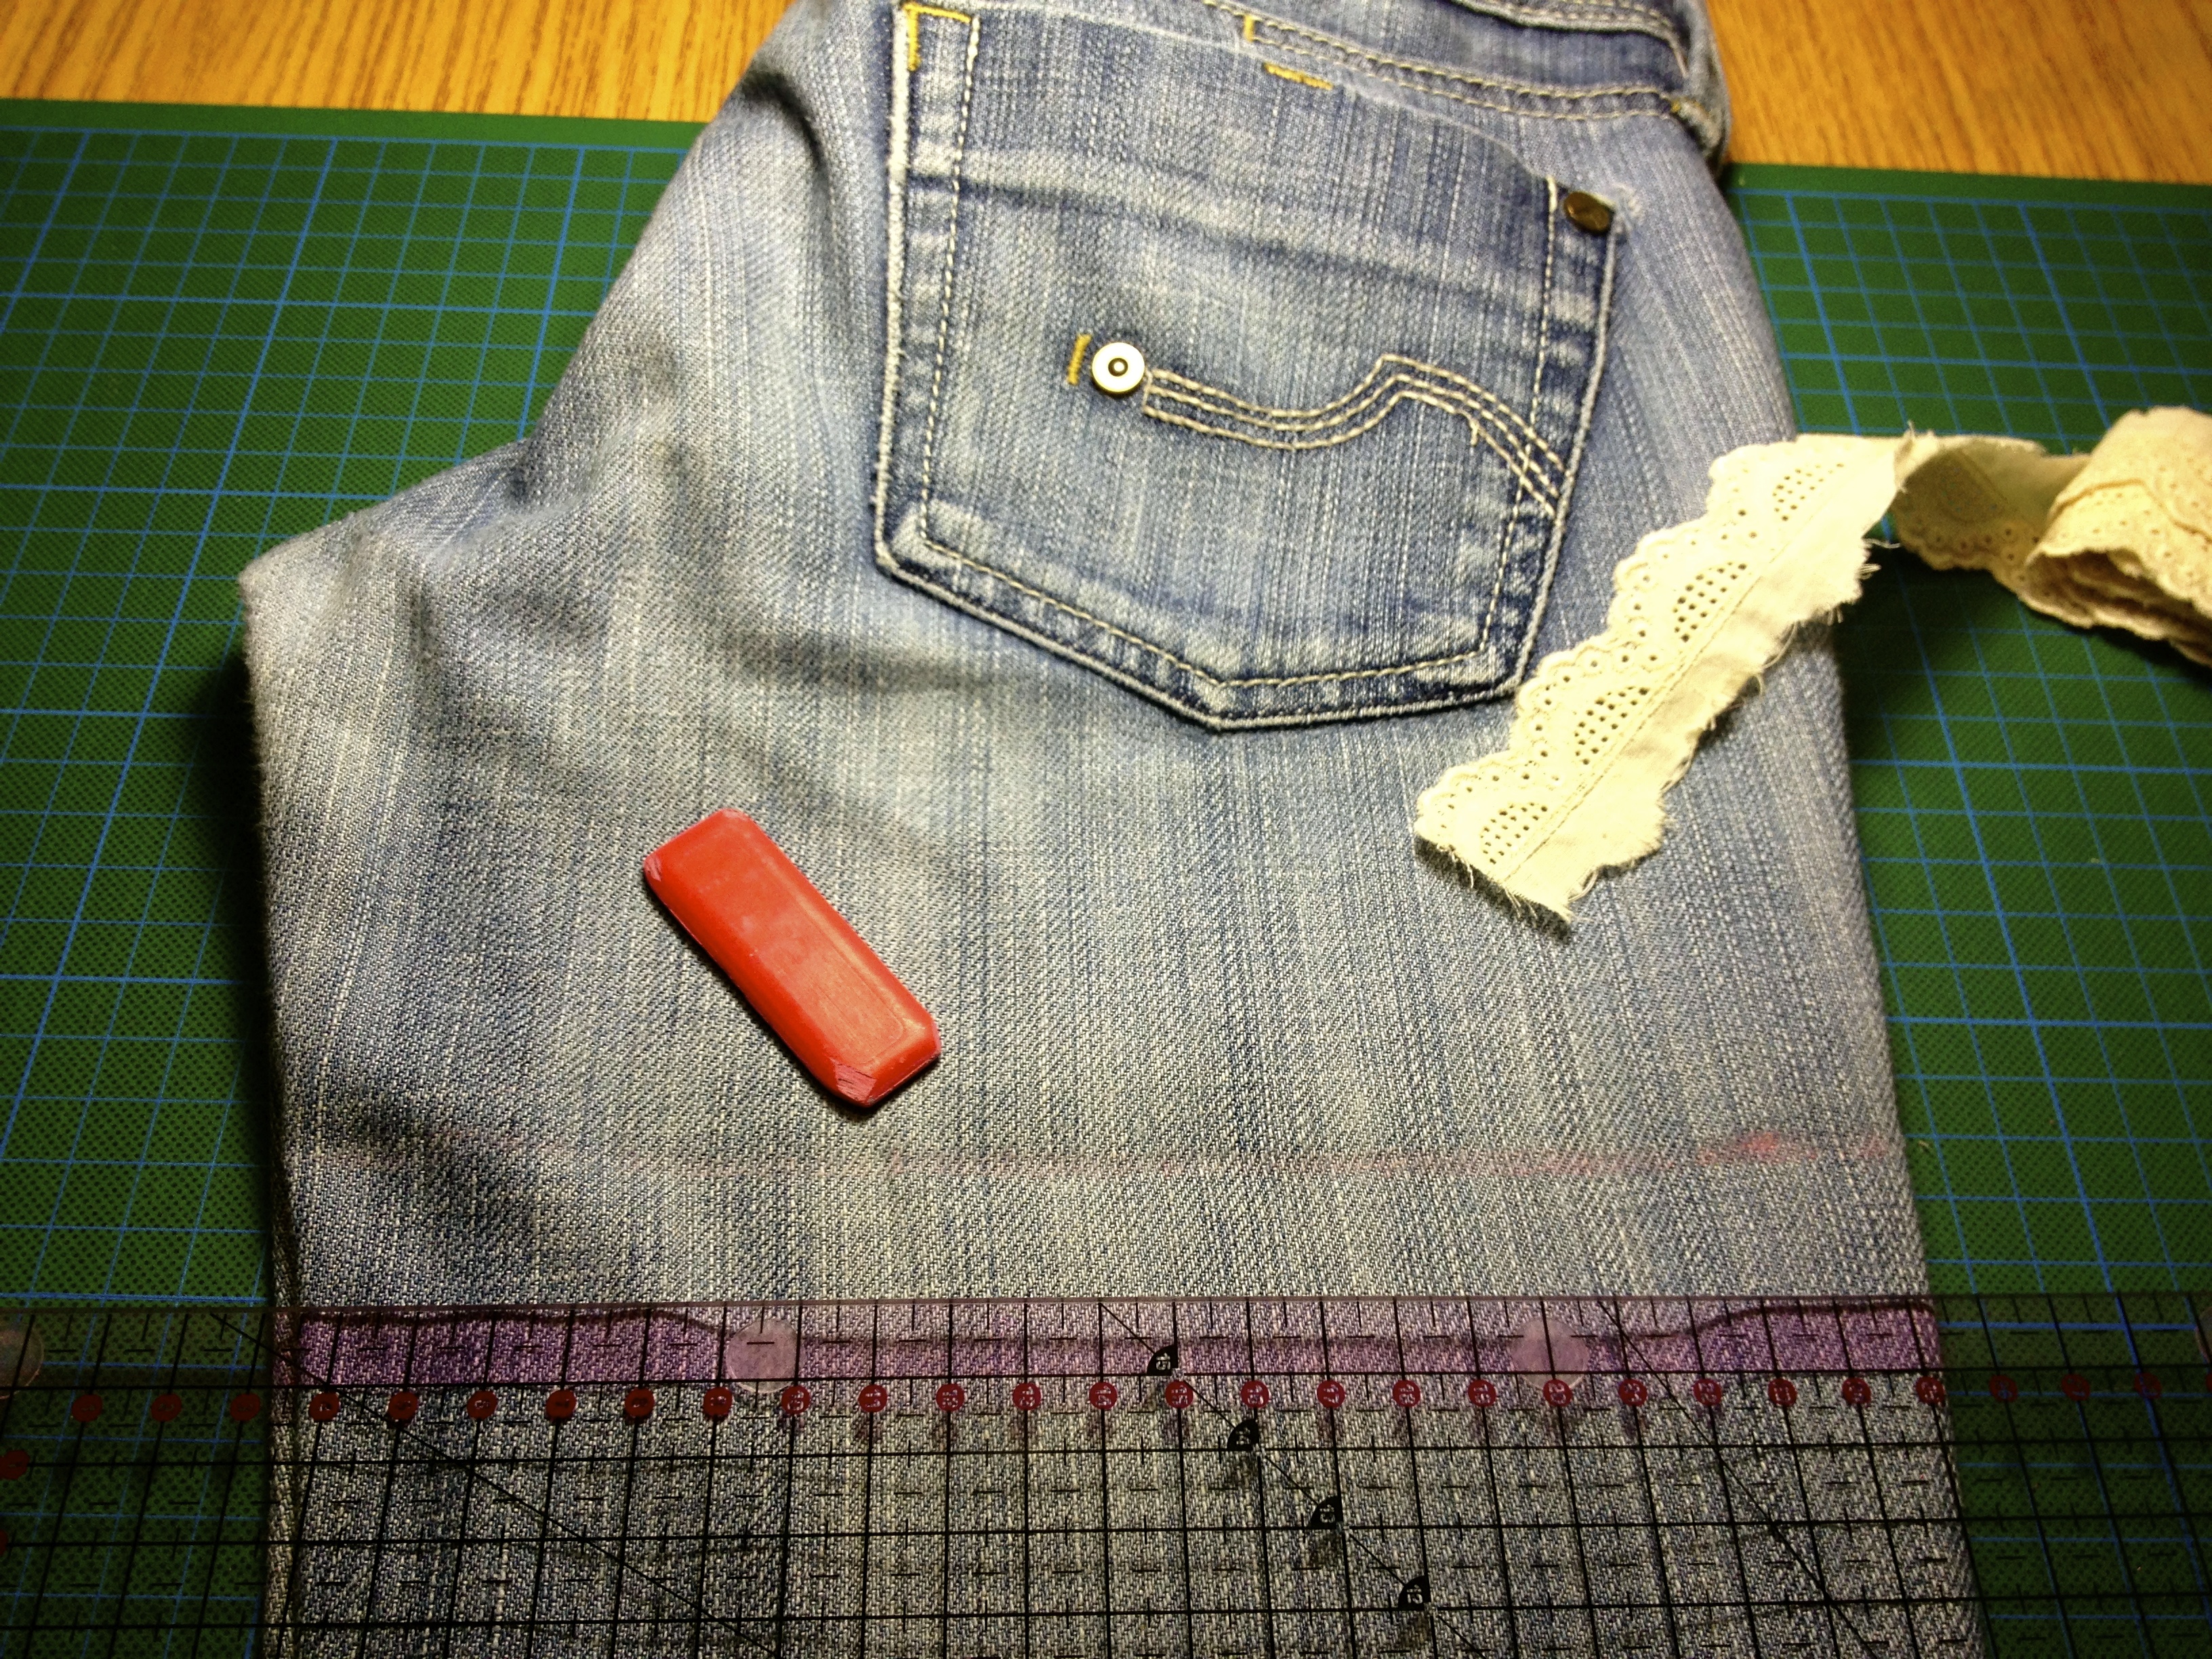
5. Time for the lace!

Now you have to pin the lace! Unfold and in the wrong side of the shorts, adjust the limit of the lace to the folding line. Be sure that you put the right side of the lace together with the jeans! On this phase you will see the wrong side of the lace. In the picture you can see the wrong side, but still a pretty side 🙂

Pin very carefully through the leg.

Pin

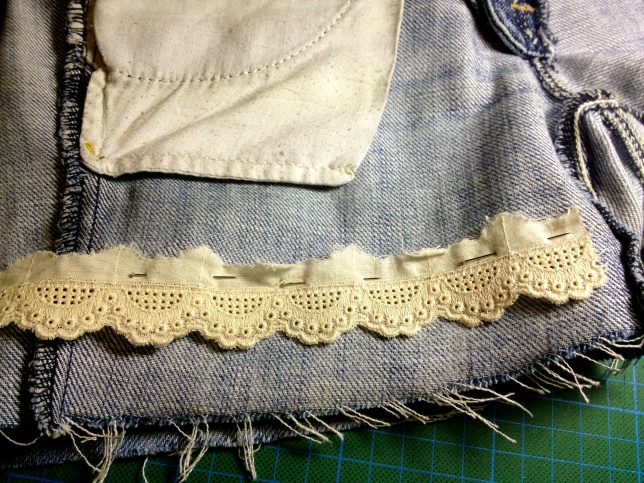
In the end you will get this!

Preview

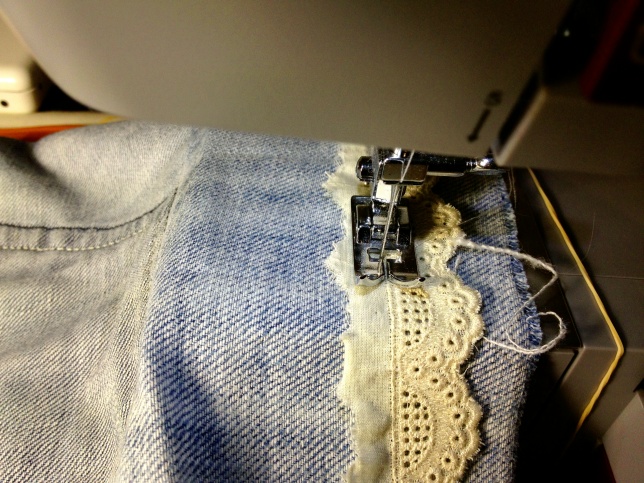
6. Now, the fun part! Sew!

Using a small stitch sew the lace to the shorts. Sew right in the beginning of the lace, right in the folded line. Remove pins while you sew.

Use any color thread you like, it won’t show up!

Sew

In the end, you will get this!

Close up

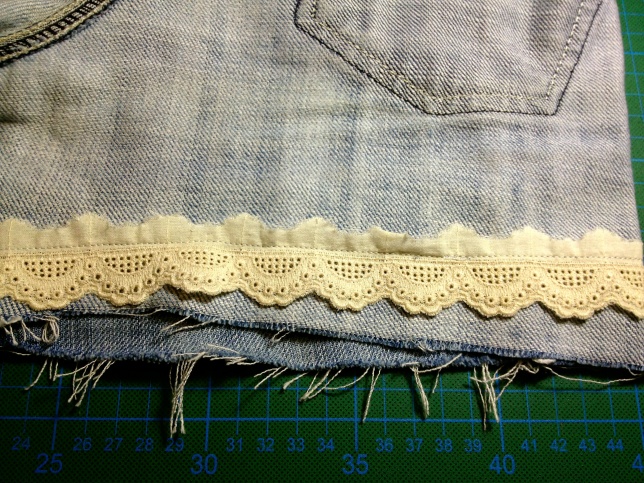
Do the same thing to the other leg and…. it’s done!

Try your new lace shorts one and fold them again, in the sewing line. The right part of the lace will be showing! Press them very well (while folded) and you will get a beautiful finish! (I haven’t press them yet in this image).

If you wish, you can sew the fold to the jeans. Use the original seam and sew them just a little bit. I don’t think it’s necessary because my lace shorts are very tight.

Tutorial - Lace Shorts DIY

So, what did you think? Are you gonna use this tutorial to make your new lace shorts? If you do make them, pleassssseee share it with me! I would love to see your creations!

I think that they are a great addition to my wardrobe, I can’t wait to summer to arrive, so I can use them!

This is my first tutorial, so please let me know any flaws or omissions that you find! I’ll listen to them and improve in the next tutorials!

I’ll be linking in these great parties!

My new fabric – Cats!

Today I want to show you a new fabric that I’ve bought!

It’s a beautiful fabric with some cute cats in it! I love cats and when I saw this fabric, I just had to buy it.
In the photo you can’t see clearly, but this is very light fabric and I will use it to make a ruffled scarf!

I’ve already thought on some projects to share with you and the light scarf is one of them. I’ll make a tutorial for this and share it with you. I don’t know when yet, but soon, soon!
This is a very easy project, so it’s perfect for a beginner that wants to wear something they made. Bags, aprons and other stuff it’s great, but I see so much satisfaction in a scarf!

Is this a gorgeous fabric or what?

Cat Fabric

Cats! Cats! Cats!

Cat Fabric

Natural mode!

Cat Fabric

Cat Detail


I’m attending this link party! Come and join us!